 Ireland Studios Photography + Motion LLC
What happens at 13,500th of a Second?

I have always been fascinated by capturing slices of time. It’s a huge reason I became a photographer. There are many methods to stop motion in photography and one of them that hold special interest for me in the studio is flash duration of strobes.
Flash duration is the motion-stopping power of strobes. From being able to stop the motion of flowing hair, to capturing a droplet of splashing water, the faster the flash duration, the crisper the final image will be when shooting in the studio. With this in mind, I decided to create a series of splash images using water and glasses using the Paul C. Buff Einstein E640 flash head with a 13,500th of a second flash duration at low power in “Action” mode.
The first image I created was three glasses with a splash in each. I decided to go with a compositing approach and shot three splash shots and a background plate as you can see below.

To begin, I wanted to find a surface that would add an interesting texture and keep clean-up to a minimum. I found a really inexpensive red fabric and rubber door mat with great water groves that soaked up tons of water. I then used diffusion paper as a backdrop with the Paul C. Buff 22″ Beauty Dish with diffusion sock and pink gel directly behind the diffusion paper. This gave a nice natural vignette and added a pop of color to the scene. To add some extra drama and a nice highlight, I placed a small rectangular soft box camera right inline with the glasses with a blue gel. I first shot a plate of the background with the glasses empty to get a clean slate to composite the three splashes in post-production.
As I mentioned above, to harness the true stopping power of the E640’s, I set the strobes at their lowest power setting and in what is termed “Action” mode. This mode allows the unit to discharge 90% of the flash power at speeds of up to 13,500th of a second. In doing this, it does loose some color constancy between shots, so WB adjustments in post-production are needed from time to time. Overall, you get an incredibly short flash duration and motion-stopping power with excellent color rendition.
With everything set up and ready to fire, I went ahead and dumped water from another glass over and over until I was happy with a single splash for each glass. As you can see, the original plate came in handy for the composite as the backdrop got pretty wet from all the splashes! After cleaning up and organizing my files it was on to cleaning up images, compositing and color balancing for the final image you see below.

Using almost the same lighting set up and swapping out a yellow gel for the background and adding an additional blue gel to the rectangular soft box, I created the second shot for this test using two separate shots and a background plate opting for a composite approach again to create the illusion of a glass in midair with water exploding from it.
For the first shot I literally just held the glass at the angle where I wanted for the final “floating” shot to be in frame to capture the bottom half of the glass and the highlights along the right edge. In the second, I dropped a plastic ice cube into a 1/3 full glass until I got the perfect splash for the final image. I used museum putty to keep the glass from falling over.

As I did with the pink splashes, I brought the images into Lightroom for color correcting and grading and then used Photoshop masking techniques to create the final composite you see below.

As you can see, the stopping-power of the Einstein E640 is awesome and you can create some pretty dramatic and beautiful images. Below is one more image that where I took just a single shot while having some fun balancing glasses using green gels. If you liked this, follow along at www.instagram.com/irelandstudios

Einstein E640 Specs from the Paul C. Buff Website:
| Einstein E640 | |
| True Wattseconds | 640 Ws max. at full power; 2.5 Ws min. at 1/256 power |
| Lumenseconds | 28,000 Ls at full power |
| Power Variability | 9 f-stops (full to 1/256 power) |
| Recycle to 100% | 1/10 to 1.7 seconds (may be fired before 100% recycle for speed shooting at reduced power) |
| Flash Duration (t.5) | 1/2,000 second at full power |
| Flash Duration (t.1) – in Action Mode | from 1/588 to 1/13,500 second |
| Flash Duration (t.1) – in Color Mode | from 1/588 to 1/8,000 second |
| Power Requirements | automatic power switching from 95 to 265 VAC, 50/60Hz (no lamp change or user attention required) |
| Average Current Draw | brief initial recycle surge current of 8.5A; average draw of 8A |
| Sync / Trigger Voltage | less than 5 volts, safe for use with digital cameras |
| Modeling Lamp | 250 Watt, 120VAC bayonet-style quartz bulb (no change is required when operating from 120 or 240VAC) |
| Flashtube | 12mm single-ring flashtube (UV-coated) |
| LCD Display | back-lit, high resolution color LCD 320 x 240 pixels; 2.4 inches |
| Stand Mount | fits stands up to 5/8″ |
| Umbrella Mount | accepts poles up to 23/64” (approx. 9mm) |
| Standard Reflector | none supplied (8.5HOR recommended) |
| Weight | 4 pounds, 5 ounces (without the power cord) |
| Dimensions | 4.8″ height x 4.8″ width x 5.7″ length (body dimensions without lamps or mounting hardware) 7″ height x 5.4″ width x 7.8″ length (overall dimensions with lamp, tube, dome and shipping cover as well as mounting hardware) |
Raindrop Cake
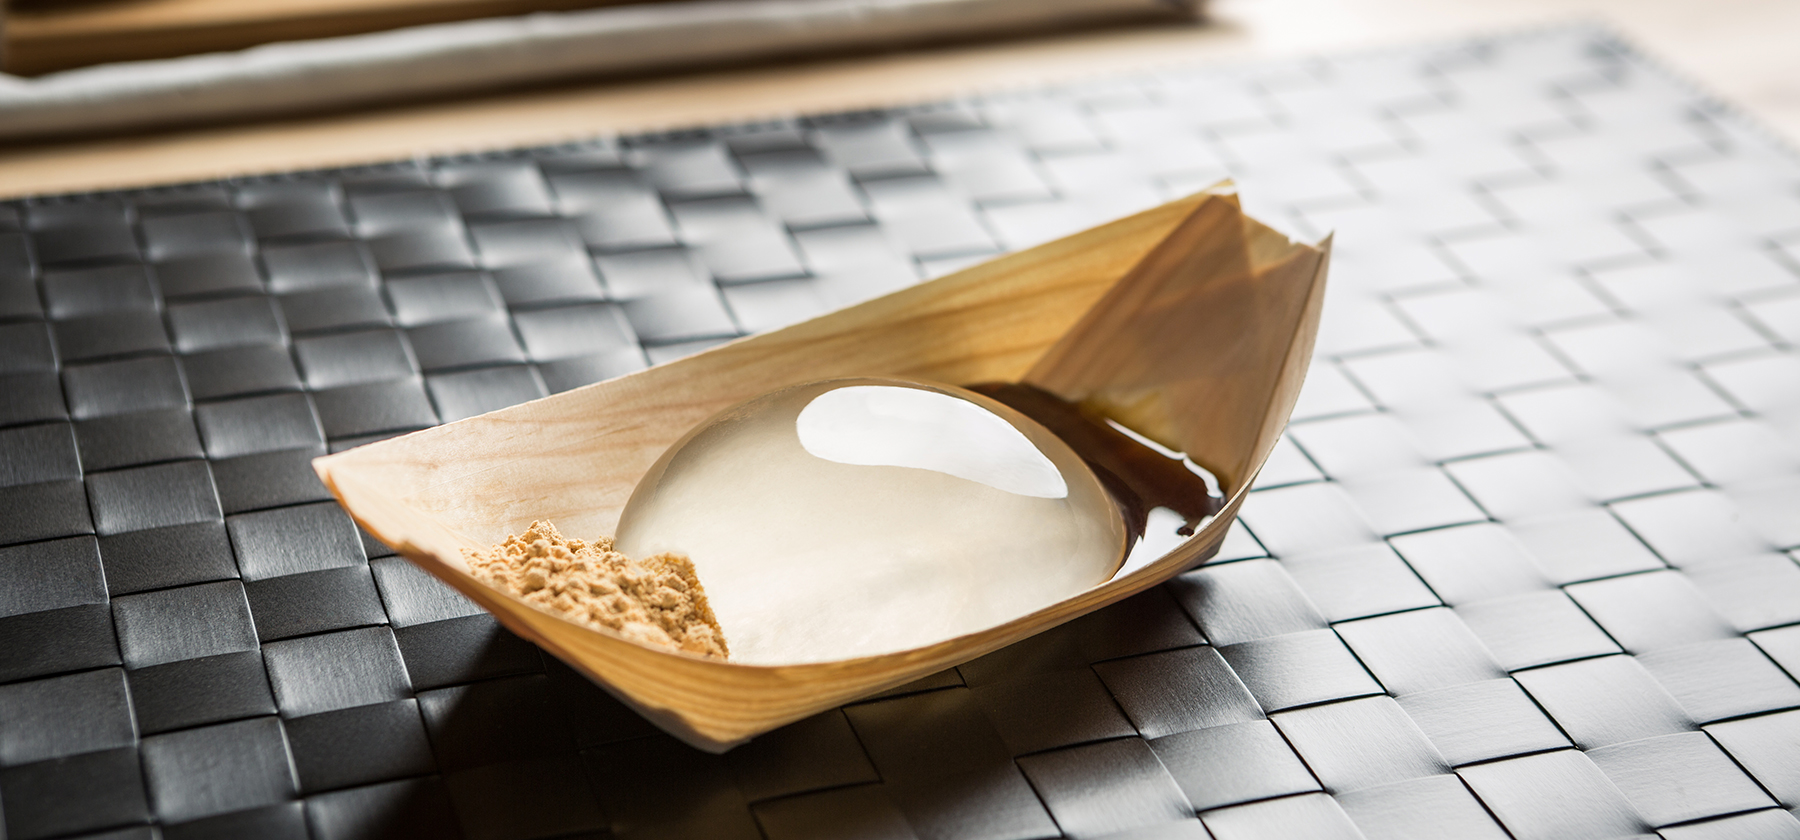

When Darren Wong, the genius behind bringing Raindrop Cake to life in the US and I first met about shooting Raindrop Cake, my immediate thought was how to approach an object that can be translucent, opaque and completely transparent depending on lighting and angle and how to really get across the texture in images. Also intriguing was that at angles where Raindrop Cake is translucent, it is essentially a lens, magnifying whatever it is underneath it.
I decided to approach it with very simple lighting, using only a medium Paul C. Buff Octabox as a light modifier with diffusion to soften the shadows just a bit. I wanted to give both an airy sense to the images while also adding some level of interest in the shadows and highlighting the glisten of the Raindrop. Choosing the camera position very carefully allowed me to find just the right angle of incidence to magnify underlying surfaces and show the ethereal glow of the cake itself as well.
In terms of styling, both Darren and I worked together to style each shot. Darren giving overall direction, with me fine tuning for the final images. Working with powder and syrup had it’s own challenges as powder is finicky and syrup doesn’t like to stay in one place for long – not to mention a cake that will evaporate if you leave it too long in open air.
Overall, it was just such a fun shoot and working with Darren was amazing. Looking forward to shooting Raindrop Cake again.

Milo

This is a portrait I shot of my son, Milo. I used just one small rectangular soft box with a grid placed about 3 feet further from camera than the subject and aimed at about 40deg towards camera from parallel to the lens plane. This ensured no spill on the backdrop and a beautiful edge along Milo’s face and highlighted cheeks. I also used the power of Mom to keep him looking away from me. The expression was one of many and told the tranquil story I was after with this image. I have to say, you gotta work fast with the little ones!
Absolut
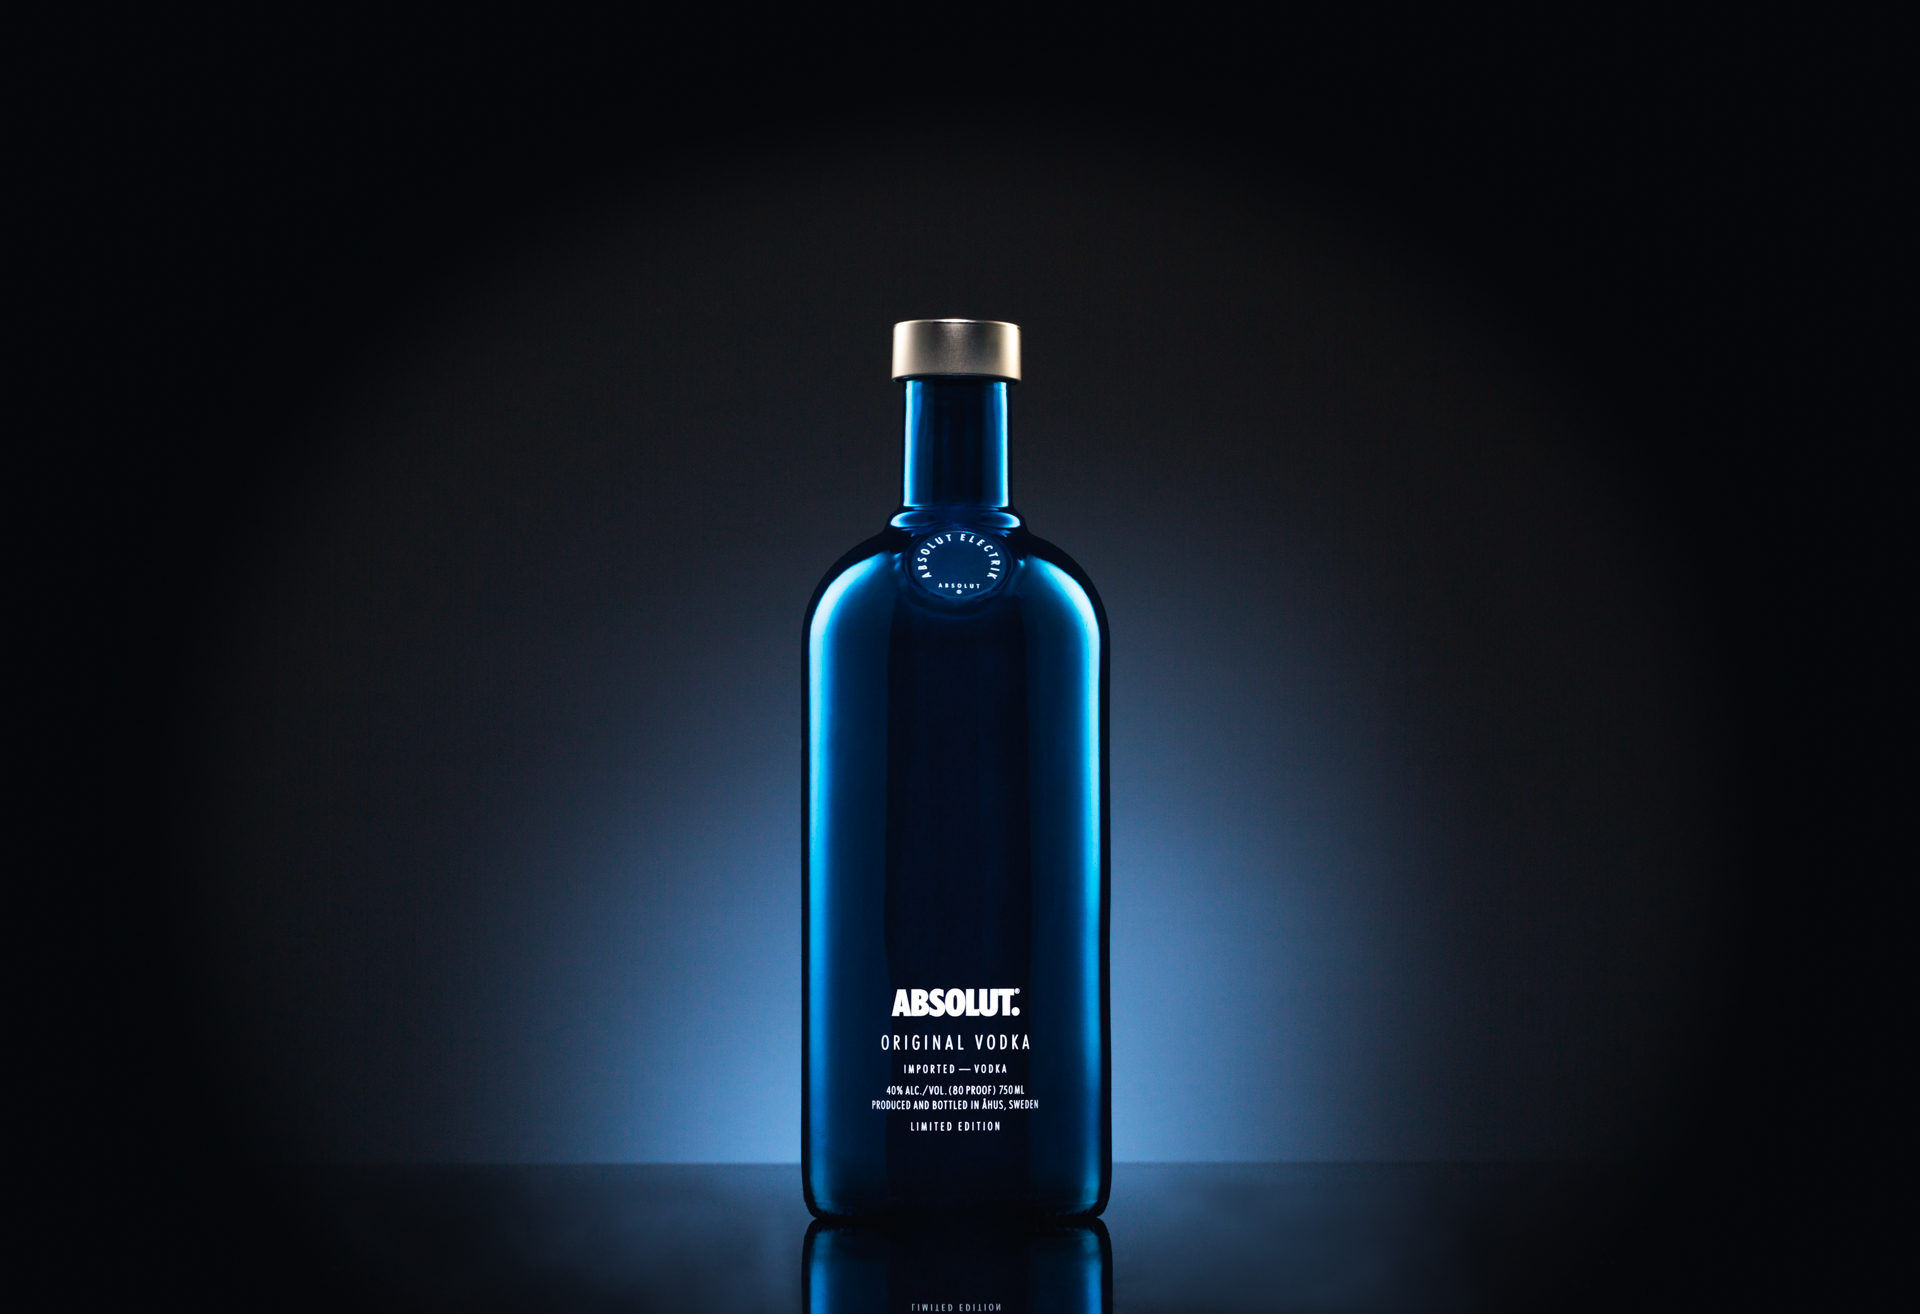
There was a need for a couple of shots of two prototype Absolut bottles for a pitch. Below are the two shots I created and how.

This first image is a limited edition bottle for the holidays. They call it Absolute Electrik. Pretty killer mirror finish bottle in both blue and silver. I opted for the blue to play with the lighting more. To achieve the look I wanted, I used two narrow rectangle soft boxes placed almost behind the bottle and angled towards the camera. Both lights were behind large pieces of Rosco Cinegel #3026 paper that were perpendicular to the camera lens to further diffuse the light and create a light-to-dark gradient on the bottle. This really gives the sense of wrapping the light. Black V-Flats blocked any spill on the backdrop and created the hard black lines on the sides of the bottle. To make the label pop, I used both a snoot and compositing with a bit of post-production clean up to be sure things were crystal clear and clean. The surface I used for this and the second shot was a black piece of Lexan. For the background light, I used a 7″ reflector with a 10deg honeycomb and a blue filter pointed away from the camera at a white wall. I adjusted the distance and angle just enough to give those unique Absolut bottle “shoulders” a bit of extra pop. All-in this 4 light, 2 shot composite gave me this unique, yet iconic Absolut image.

The second shot ended up being lit in a similar fashion to maintain the iconic look, but I changed up the depth of field and the background light position and color to let this glass bottle shoulders pop against pure black. I also wanted the crystal structure to show in a different light than originally intended and to almost feel like a black and white photo of an old decanter. This bottle had a pad that lit up, but I opted to go with it naked. I also changed the way I lit the label and went with a full 2 shot composite where I lit the bottle from above the camera with a horizontal strip box to get the label perfect and composited that with the beauty shot of the bottle. All-in it was a 5 light, 2 shot composite.
Big Shiny (Tiny) Cars
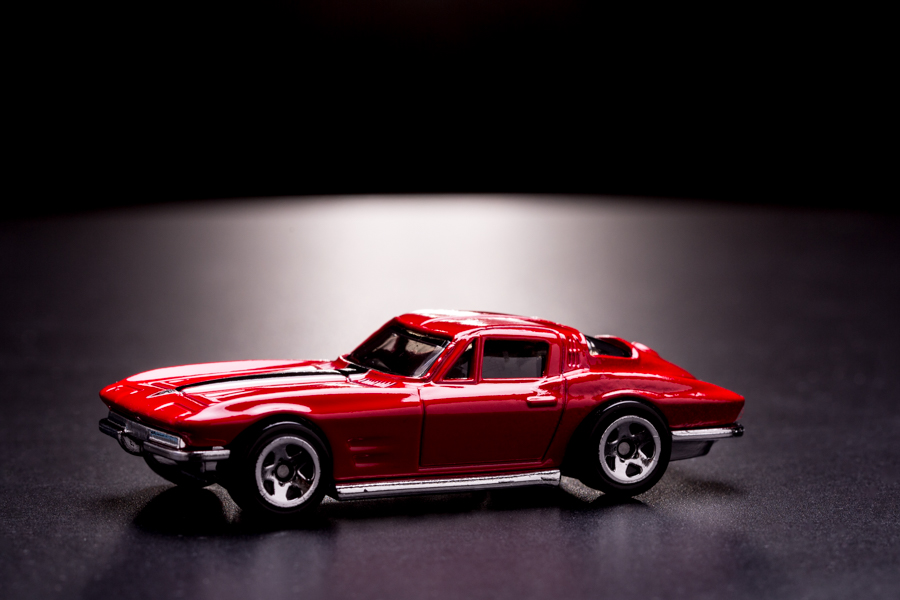
Had a friend ask me to try out “fancy car” lighting on some toy cars. Went with a two light setup on a small black IKEA side table. The first light was camera right and above the subject with a square softbox. This enabled me to catch those highlights and create the under subject shadow. The second light was placed behind subject with a 7″ reflector to create the dramatic horizon line, edge light and undercarriage highlights.
